
| < | > | archives • main |
| < | > | archives • main |
|
12 MONTHS OF PHOTOSHOP - PREP AND MASKS
I wanted to put some time into my Photoshop project this weekend, too.
So here's what I've done so far:
Read all the David tutorials for this month as well as the prep ones: Digital Workflow: all four parts, Creative Workflow, Portraits: part 1, Masking: part 1, and Lanscapes: creating dramatic skies I will need to reread them again of course, but it was some good reading for now. Here are a few lessons I learned in general (they're all over the place, mostly for me to remember):
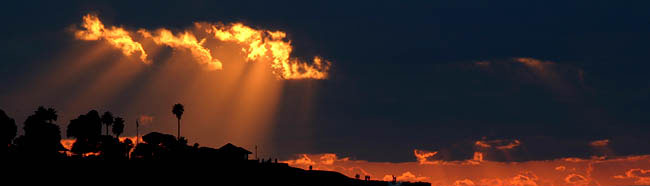
So I wanted to put a little example of what magic masks can be. Be forewarned that this is a quickie so it's far far from ideal and the original wasn't RAW so that hurts the process, too. Not to mention I over-saturated for effect. So with all that.... Here's a photo I took last year in Pismo Beach:  As you can see it's really flat so if I were to do some basic curves to try to mess with the white point and some highlights and lowlights, here's what I get:  It makes the image a bit more full of contrast but now my sky is completely blown out and you can see no detail at all. If I were to use masks and do my saturation/curves using masks, here's what I can accomplish:  Yes, it's over-saturated, but look at the detail in the sky and the detail in the sea. You can have your cake and eat it, too. More on masks next week. January 11, 2009 | 12 months of photoshop | share[]
| |
| ©2008 karenika.com |